Saturday 31 October 2015

Friday 30 October 2015

Let's finish the week with a festive Friday .......

Happy Friday folks!

The weekend starts here ..... whoo hoo!!  And it's Halloween tomorrow ...... mwahhahaha!!

We're still in the festive mood though today ......... with the last of my Clarity samples.

More Christmas designs using the brand new Festive Stencils, plus a couple of ideas that could be used all year round ...... for any one of those other special occasions that crop up during the year.

Lets start with a bit of Holly shall we ......


A gorgeous background stencil full of holly leaves and berries.  Don't just use it for backgrounds though ..... make it the focal point!

I've used it here with Grunge Paste ...... let it dry then replaced the stencil back over the top and added colour using Distress Inks .....  Grunge Paste takes colour so well so this is a really easy, but effective way to create your Christmas cards.


I also added glue to the holly berries and sprinkled them with festive red glitter to add a touch of sparkle.


A pretty red ribbon and a cute little tag give the finishing touches.
I've used the stencil on the tag, this time just with ink directly onto a piece of Kraft card, and then embossed my greeting over the top ....  from one of the Word Chains ......  with gold embossing powder.

Why not make nice tags to go on all those wonderful festive gifts ..... here's a really quick and easy idea


Stenciled background using clear texture paste .....


Holly stencil as before, with the Grunge Paste and then coloured.  Cut out a panel to go onto the front of your tag .... I used a circle punch but it could be any shaped punch or die.


A touch of festive glitter onto the leaves and berries, and a nice embossed greeting to finish off


Next up is the Christmas Tree stencil .... love this!


I've simply inked through the stencil using Distress Inks, to create my Christmas tree.  Then, I used the inside piece to cover up the tree whilst I did the winter scene in the background ......


I then covered the outside again, so that I could decorate the tree, using the other background stencil that you get in the set ..... the stars.  Grunge paste and glitter did the job nicely .....


I added a cute little tag to the bottom, with a sprinkling of Chunky white embossing powder here and there.


Finally, that fab Stars stencil is great ...... and not just for Christmas either.  How about some quick and easy birthday cards ......


Done in whatever colours you choose.  I've simply masked off the bottom of my card .... used the stencil with various colours of ink .......


Added a touch of glitter  ..... why not!


And finished with one of the Word Chains .....


You don't like multi-coloured .... then just keep it simple ......


All one colour with just the one gold (or silver if you like) star.  I've used Grunge Paste again and coloured with acrylic paint this time


Just perfect for all your little stars!

Well that's it from me today .... I've got some pumpkins to carve then I'm off out for lunch. We're checking out a possible venue for our crafty groups's Christmas do!! 

Thanks for popping by .... enjoy the rest of your day and have a lovely weekend. 

Cheerio until next time

Linda
xx

Thursday 29 October 2015

Still in the festive spirit .....

Happy Thursday to you,

Weekend's on it's way again (yeah!) 

Had enough of Christmas yet?  No ...... oooh good!  If you're screaming YES!!!! at me right now ...... sorry, because I thought I'd stick with the festive theme for this weeks Less is More Challenge

It's Sketch week and here's what we had to follow ......


Very simple and straightforward ..... lots of white space as always.
Here's my take on it .... what do you think?


I've turned it round a little ..... gone for landscape rather than portrait.  Still CAS enough I hope ....... and I've included the partial panel on the front ... sort of ...... with the dusting of ink.

The snowflakes are a mix of Stampin Up! ( the large one in the centre) and Penny Black for the smaller ones .....  and they've been stamped using various shades of blue ink


Once these were dry I brushed over the top using Stormy Sky Distress Ink to get the look of the panel from the sketch ....


The sentiment is from the Happy Little Stampers ...... Mixed Christmas Sentiments


And I finished off with a touch of fine crystal glitter on the main snowflake ..... done!


It wouldn't be me if there wasn't something on the inside too .....


More sparkly snowflakes and a nice festive greeting ....... perfect!


It's definitely beginning to look a lot like Christmas ...... well down at the local garden centre it is anyway.
We were down there last night for the Christmas preview evening ..... lots of festive displays full of glittering baubles and twinkling lights, with the odd Christmas carol being played in the background ...... Ho! Ho! Ho!
No mulled wine though this year (sigh!) ..... maybe we were a little too early!!

I couldn't resist topping up the old tree decorations though, all the sparkle got to me! ....... a little red and gold for the main tree .... nice!


And some icy silver and white for the one that's usually in the hall ..... pretty!


Now I'm a bit weird when it comes to buying baubles ...... I always have to buy them in odd numbers. I just didn't realise that last night I ended up with 13 (oh no!) .... unlucky for some ..... unlucky for us actually!

When we got back to the car we realised that hubby had left the headlights on (long story but, the car no longer beeps when you get out and leave the lights on ..... so you forget sometimes) 
Now we hadn't been in there that long but, the battery was dead!  Car wouldn't start, nothing there .... completely drained ...... just marvelous!!

We had planned on going on somewhere to get dinner out but instead we were stuck on the garden centre car park!
After a few phone calls to see if we could get some jump leads, or someone to pick us up we decided to get a cab and go on to the restaurant anyway ..... Lauren's boyfriend could come to the rescue (again!) but not for a couple of hours.  So off we went .... well, we were out anyway!

We had a fabulous meal down at a place called The Forge ..... good food, nice wine and we virtually had the place to ourselves, there was only a couple of other people in there.
We got picked up later, went back to our little old car and would you believe it ...... tried the engine and she started straight away ..... what was all that about!!!?
So, no messing around with jump leads in the dark ...... the evening ended well after all.  I must remember to buy a couple more baubles though ..... I'm not leaving it a 13!!!

Thanks for popping by .... enjoy the rest of your day.

Cheerio until next time

Linda
xx

Wednesday 28 October 2015

More Clarity samples from the weekend .......

Happy Wednesday,

Middle of the week already ...... and I've done nothing!!

As promised here's a couple more of my samples done for the Clarity show last weekend.
As you know Barbara was back on the telly with some stunning new Christmas stencils.  Here's a couple more ideas using the gorgeous snowflakes from the Christmas Stencil Set ......


Here I've used them to create my snowy sky ....... I've placed the stencil across the top section of my card and inked over the top using Distress Ink (Stormy Sky).


I then created my little winter scene using stamps from the Christmas Wee Folk and a piece of torn copier paper to create the hillsides


The cute little snowman was stamped onto a separate piece of card, fussy cut and attached using foam pads to add a bit of dimension.

A touch of fine glitter to the hills and of course on the snowflakes adds a nice sparkle


I mat and layered using black and white card and then added the whole thing onto a larger piece of card.

Can you see, I also used the snowflake stencil on the top half of the larger card to carry the design through


And I finished off with a festive greeting, done using one of the Christmas Word Chains


Snowflakes don't always have to have a blue background.  Why not try using other colours ..... lilac and purple look nice, but what about pink or red even ......


This is a really simple card to make, but very effective ....... great for batch cards and lets face it we all need lots of Christmas cards to send don't we!

Again I've just inked over the snowflake stencil using Distress inks (I think it was Festive Berries with a touch of Aged Mahogany).  and then spritzed over the top with a little water


I added a touch of glitter to the snowflakes ..... and few sequins here and there for added sparkle


I finished off with the Word Chains again ...... stamped in red and embossed with a sparkly powder ..... simple!


Speaking of the Word Chains, here's another simple design for your Christmas cards ...... use the words to create a tree ......


I've used stamps from both of the Christmas Word Chains ..... and gold and white embossing powder, alternating for each of the words


I stuck a glittery gold star on the top ....... and a sprinkling of Chunky White Embossing  Powder here and there ......


Gave the tree a pot to sit in ...... and added some gold thread and sequins to the bottom


A bit of matting an layering and a gold leafing pen around the edge and you're done!


That's it from me today ..... time to get in the old craft room I think.

A quick reminder though, Barbara is actually back on the telly today ..... there's a One Day Special with the fabulous Clarity Groovi System.  There's been shows throught the day but don't worry if you've missed them there's still 2 to go ..... 4pm and 7pm so make a note, set the alarm you won't want to miss them .....

HOCHANDA  Sky channel 663 Freeview 39 or Freesat 817    
Or watch LIVE online at www.hochanda.com

Well it's really going to start feeling like the festive season is on its way this evening .... it's the Christmas Preview Night down at the local garden centre


Hmmmm ........ can I resist buying Christmas decorations in October ...... I doubt it!!!

Thanks for popping by ...enjoy the rest of your day.

Cheerio until next time

Linda
xx

Tuesday 27 October 2015

Let's get festive with Clarity

Happy Tuesday!

Having a good week ...... I do hope so.

It was a bit of a busy weekend over here but .... we got there in the end.  What with Design Team stuff to do, Blog Hop post to schedule (cut that one a bit fine!!), re-arranging bedrooms for furniture that never arrived ..... but that's another story (one with not such a good ending either so I won't go into all that!) and of course Barbara was on the telly!  Yes Clarity was back on HOCHANDA on Sunday, with a definite festive feel ....... and didn't the DT do well!  Great Christmas designs from everyone ..... only 58 days and counting folks (eeeek!)

I thought we'd have a bit of a festive week on here this week ..... that way I can share some of my Clarity samples with you in full.

In case you didn't see Barbara, there were some fab new Festive Stencils on the show ..... 3 great Christmassy shapes and 2 fabulous background stencils all together with a FREE 7x7 stencil folder.

Here's just a couple of examples using one of the shapes ...... the Christmas Bauble
I think this one is my favourite ..... it's large enough to use as an aperture and ink through it to create a little winter scene in there (which Barbara did live on the telly ..... great demo)


With some Clarity stencils you not only get the outer bit, but you get the inside bit too ..... the inny and the outy as we call them.

I used the inny bit on my card ...... I drew round it and then cut it out using a craft knife to create the aperture .............


Then, on a separate piece of card I used the outy bit of the stencil to create my little Santa scene using the Christmas Wee Folk


I added a touch of colour around the aperture, using Distress Ink, and spritzed with a little water


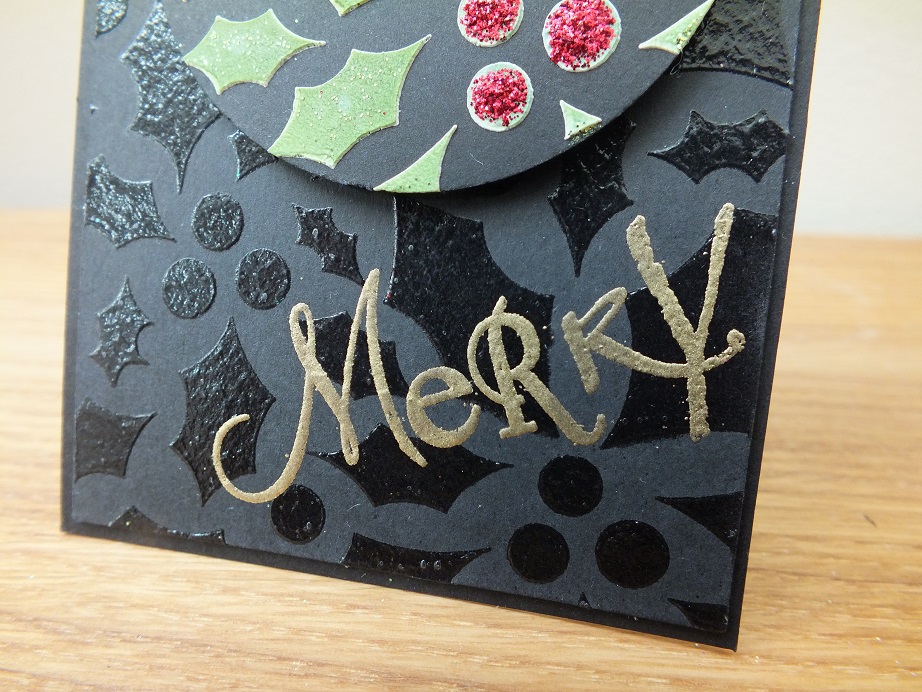
A touch of Chunky White Embossing Powder here and there to give the snow effect and I finished it all off with a few die cut holly leaves and some gems.


One of the Christmas Word Chains gave the perfect finishing touch ......


Here's a completely different look using the same bauble stencil ...... and adding in the pretty snowflakes from the Christmas Stencil Set ......


I cut a piece of white card to the size I wanted (finished card size is 8x8 inches by the way) then I used the stencils to ink through to create the baubles.


The snowflake stencil was laid over the top of the bauble stencil and I applied Distress Ink over the top, being careful not to move the snowflakes around


The blue one was done first, then I used the inny bit to mask that off, whilst I inked the purple one .... easy!

I finished the pair with a touch of fine crystal glitter on the snowflakes and doodled a 'chain' to hang them .....


This was then mounted onto a background made using Distress Spray Stains on white card, then spritzed over with Perfect Pearls before adding a piece of cling film, scrunched on the top and left to dry .......
Once this is dry remove the cling film and you're left with this fabulous frosty looking effect


Not sure the shimmer comes across that well in the photos but trust me it's there and it's gorgeous and it's so easy to do.

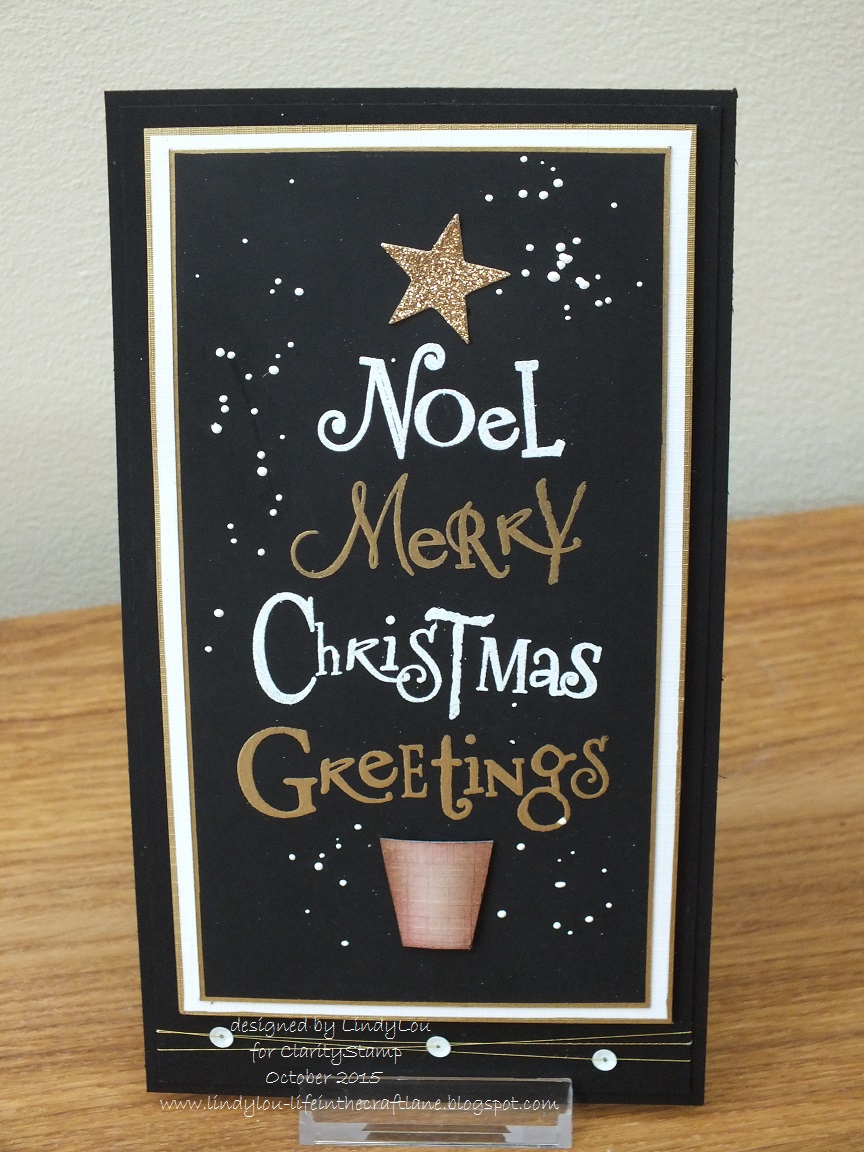
I used the Word Chains again for the greeting ..... stamped in black Archival ..... and finished off with a cute metal embellishment


Hope you like them.
Next time I'll show you more of those gorgeous snowflakes ..... and a really simple way of using the Christmas Word Chains

Thanks for popping by .... enjoy the rest of your day.
I'm off to get the little man from school now, then he's off to a Halloween Disco later .... in fancy dress.  He has a better social life than I do!!

Cheerio until next time

Linda
xx